SalonLogic Pro User Guide
Everything you need to set up and run your salon management platform
Welcome to SalonLogic
SalonLogic Pro is a complete salon management platform built by a former salon owner with 20 years of industry experience. It covers everything from daily takings to VAT returns, staff rotas to HR documents — all in one place.
Step 1 — Initial Setup
Work through these steps in order before entering any operational data. Some features depend on others being configured first.
Company profile
Go to Settings → Company Info. Fill in your salon name, address, phone number, and email. This information appears on all documents you generate through the platform.
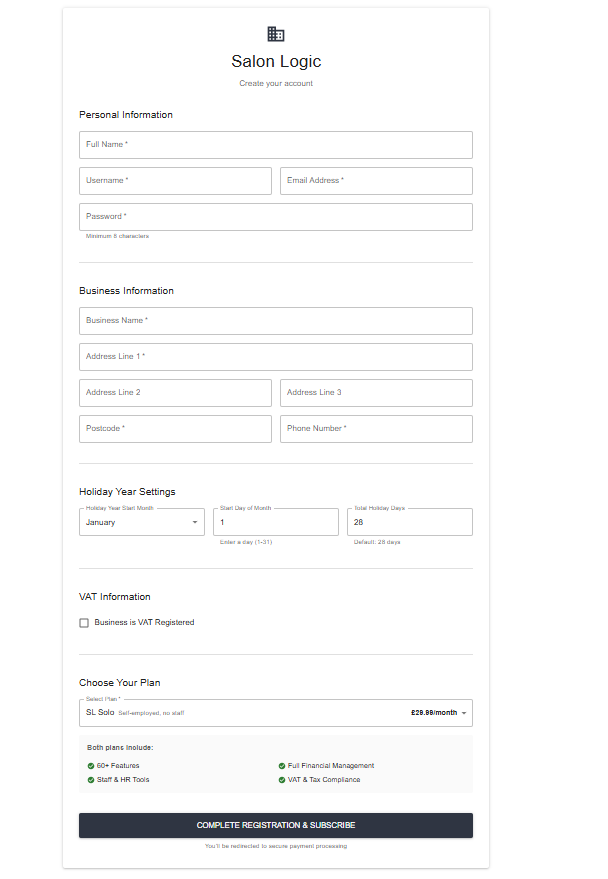
Settings → Company Info — complete all fields before generating documents
VAT settings
Go to Settings → Company Settings. Toggle Business is VAT Registered if applicable, then enter your VAT number and select your scheme.
VAT settings — configure before entering any financial data
Working week & non-working days
Go to Settings → Non-Working Days. Add regular salon closure days and bank holidays. These are used by the leave system to calculate entitlements correctly.
Settings → Non-Working Days — add bank holidays and regular closure days
Step 2 — Add Your Employees
Go to Team → Employees → Add Employee, or use the bulk import for multiple staff members. Each employee needs a system login — their role determines what they can access.
Add Employee — personal details section
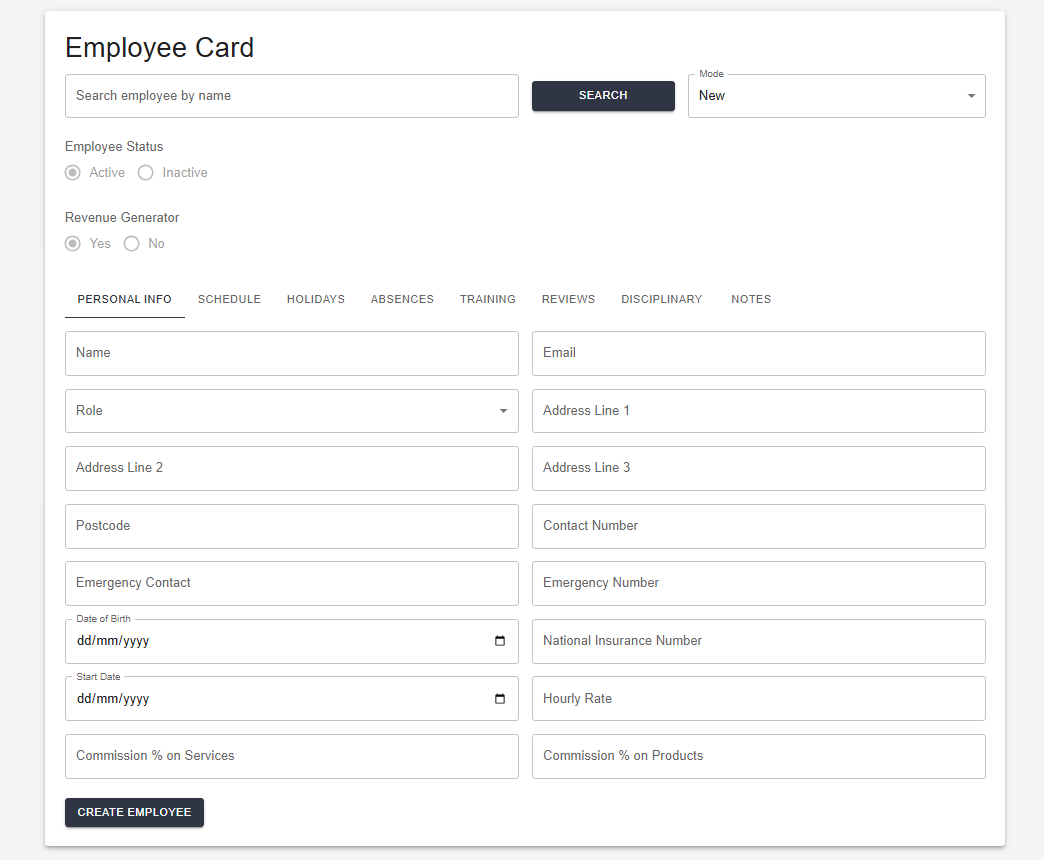
Employment details — pay type, rate, and start date
User roles
| Role | Access Level | Typical Use |
|---|---|---|
| ACCOUNT_OWNER | Full system access including settings, billing, and all reports | Salon owner only — one per account |
| ACCOUNT_MANAGER | Can approve leave, view financials, and manage staff. Cannot access billing or system settings | Salon manager or senior stylist |
| ACCOUNT_USER | Can view their own records, submit leave requests, and access the employee portal | All other team members |
Role selection — choose carefully, this determines what each person can see and do
Pay rates
Go to Team → Payroll → Pay Rates. Set each employee's pay type (hourly, salary, or chair rental) and their rate. This feeds directly into the pricing calculator's overhead calculation.
Step 3 — Bulk Data Import
If you are moving from another system, bulk-upload your existing data via Data → Import.
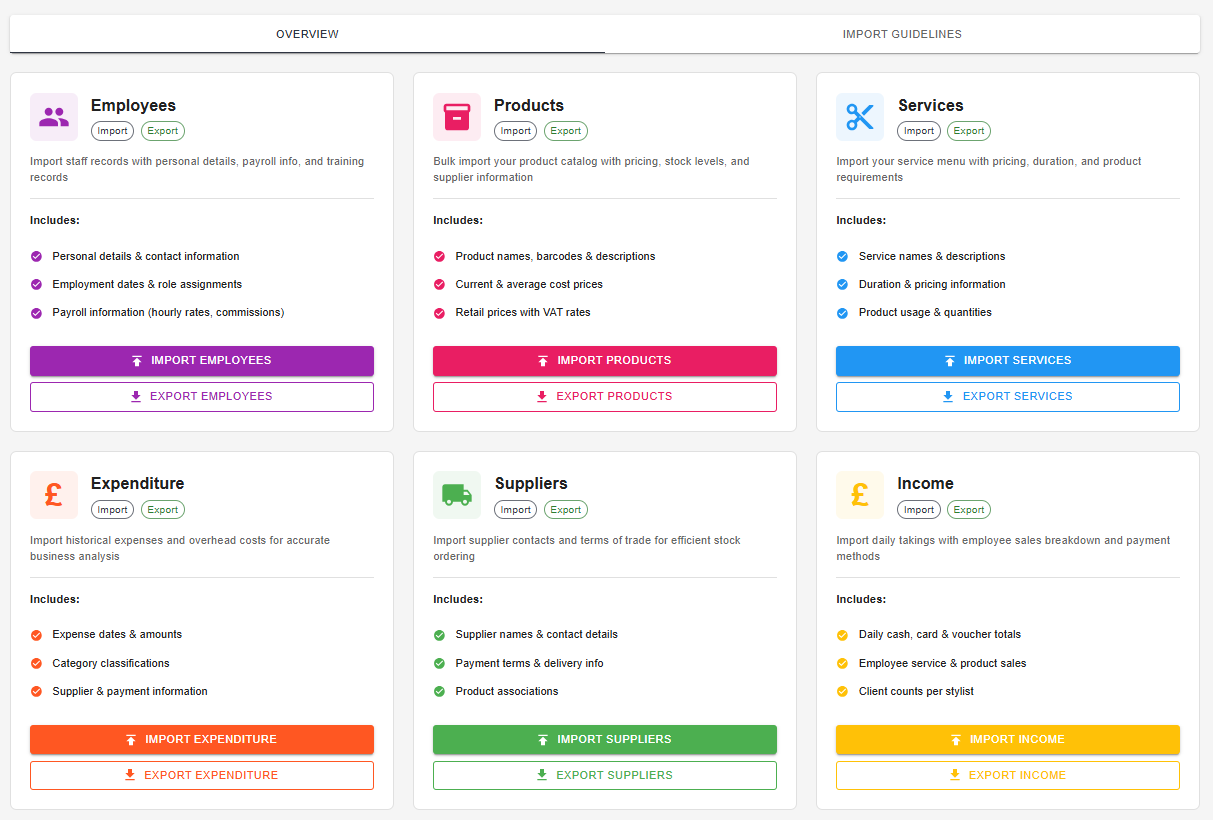
Data → Import — six import types covering all core data
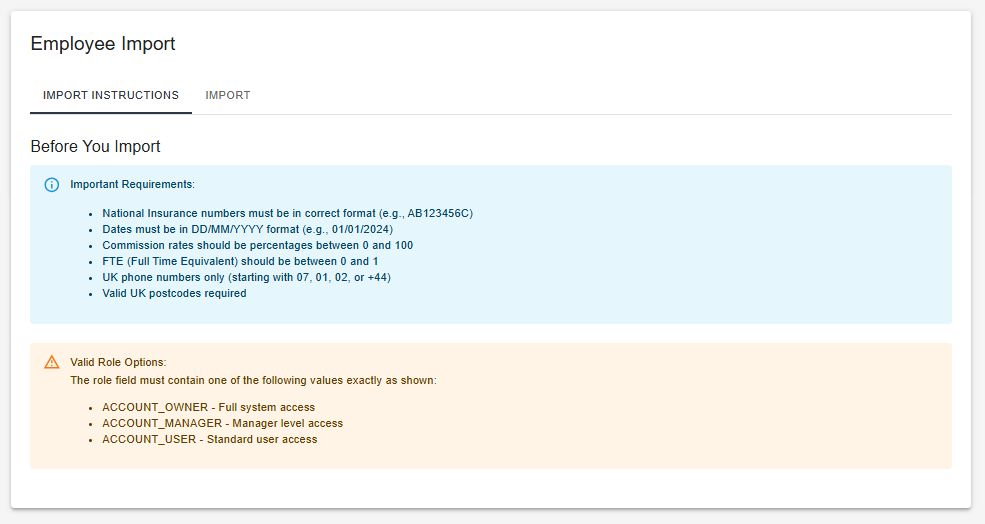
Employee import fields
| Column | Req? | Format | Example |
|---|---|---|---|
name | ✱ | Full name | Jane Smith |
email | ✱ | Valid email | jane@mysalon.co.uk |
address_line1 | ✱ | First line of address | 123 High Street |
postcode | ✱ | Valid UK postcode | AB12 3CD |
contact_number | ✱ | UK number | 07712345678 |
date_of_birth | ✱ | DD/MM/YYYY | 15/06/1990 |
national_insurance_number | ✱ | AB123456C format | AB123456C |
start_date | ✱ | DD/MM/YYYY | 01/01/2024 |
hourly_rate | ✱ | Number 0–1000 | 12.50 |
role | ✱ | ACCOUNT_OWNER / ACCOUNT_MANAGER / ACCOUNT_USER | ACCOUNT_USER |
commission_services | – | Percentage 0–100 | 10 |
full_time_equivalent | – | 0–1 (1 = full time) | 1 |
Supplier import fields
| Column | Req? | Format | Example |
|---|---|---|---|
supplier_name | ✱ | Up to 150 characters | ABC Hair Supplies Ltd |
type | ✱ | Services or Products | Products |
address | ✱ | Full address as single field | 123 Trade Park, London |
contact_number | ✱ | Phone number | 01234567890 |
email | – | Valid email | orders@supplier.co.uk |
vat_number | – | GB followed by 9 digits | GB123456789 |
Product import fields
| Column | Req? | Format | Example |
|---|---|---|---|
name | ✱ | Product name | Wella Koleston 60g |
current_cost_price | ✱ | Cost price ex-VAT | 4.50 |
unit_type | ✱ | ml, g, uses, or each | ml |
retail_price | – | Selling price | 12.99 |
reorder_level | – | Stock quantity trigger | 2 |
Service import fields
| Column | Req? | Format | Example |
|---|---|---|---|
service_name | ✱ | Name of the service | Full Head Highlights |
duration | ✱ | Minutes (5–480) | 90 |
price | ✱ | Selling price | 75.00 |
product_usage | – | ProductName:Quantity, comma-separated | Bleach Powder:50g |
Expenditure import fields
| Column | Req? | Format | Example |
|---|---|---|---|
date | ✱ | DD/MM/YYYY | 01/02/2024 |
supplier_name | ✱ | Must match a supplier in the system | ABC Hair Supplies Ltd |
category | ✱ | Expenditure category name | Stock |
description | ✱ | Brief description | Monthly colour order |
total | ✱ | Total amount paid | 250.00 |
payment_type | ✱ | CARD or BANK | CARD |
Income import fields
| Column | Req? | Format | Example |
|---|---|---|---|
date | ✱ | DD/MM/YYYY | 01/02/2024 |
employee_name | ✱ | Must match employee name exactly | Jane Smith |
worked_today | ✱ | true or false | true |
cash_sales | – | Total cash taken | 120.00 |
card_sales | – | Total card payments | 380.00 |
service_sales | – | Service income total | 450.00 |
product_sales | – | Retail product sales | 50.00 |
client_count | – | Number of clients seen | 6 |
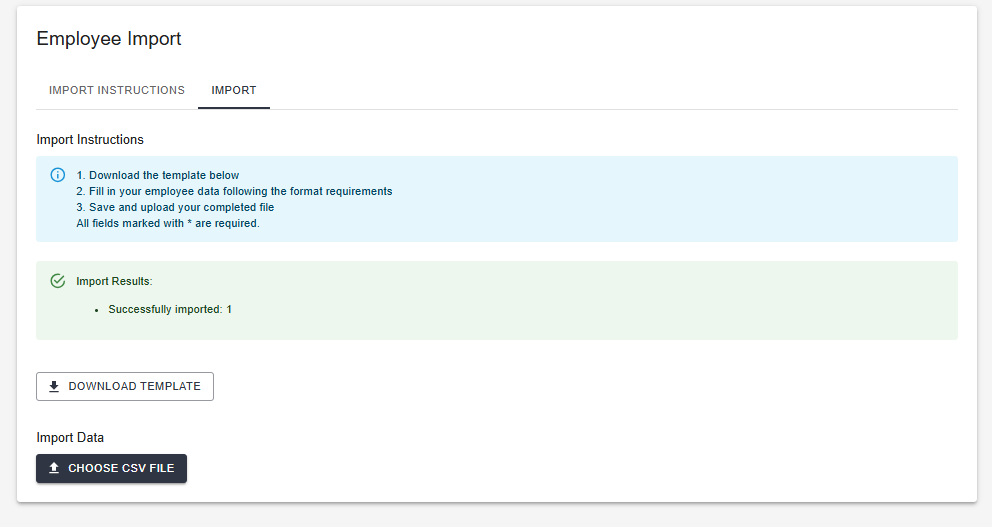
Successful import — a summary of records created
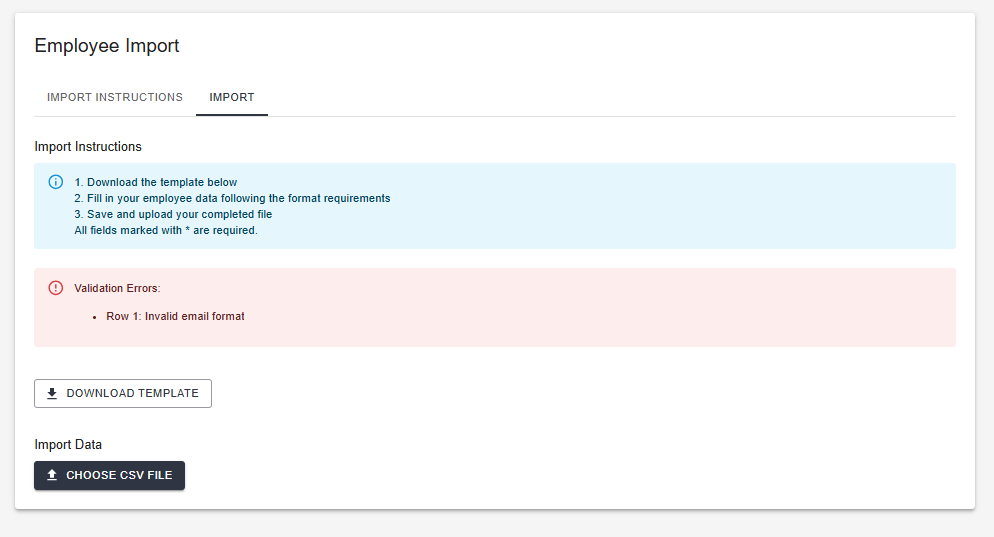
Validation errors — fix the highlighted rows in your spreadsheet and re-upload
Income & Daily Takings
Go to Income → Daily Takings to record each day's sales. The system records cash, card, and voucher totals at salon level, and service sales, product sales, and client count per employee.

Income → Daily Takings — the main entry form
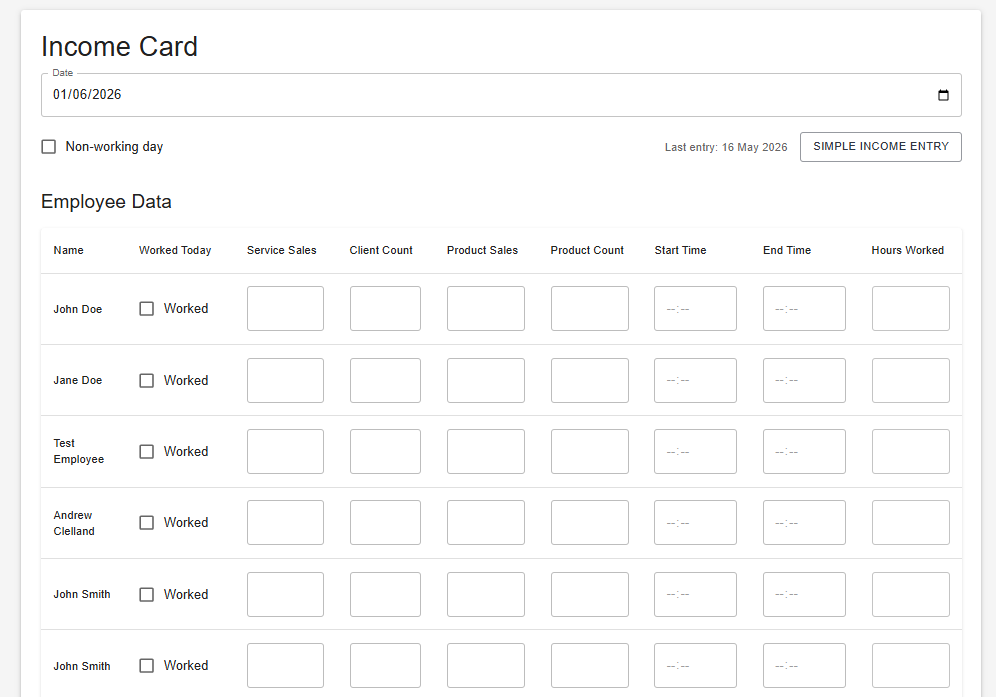
Per-employee rows — enter service sales, product sales, and client count for each stylist
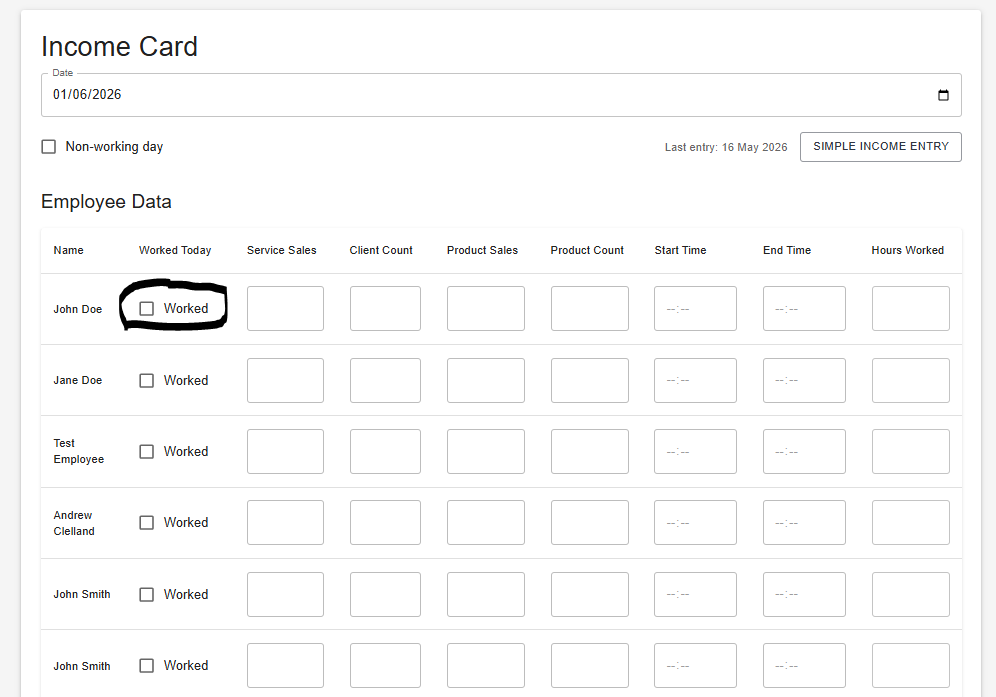
Worked Today toggle — switch off for any employee not working that day
How do I record today's takings?
How do I correct a takings entry?

Date picker — navigate to any previous day to view or correct entries

Confirmation after a successful save
Expenditure
Record all business outgoings through the Expenditure module. Use Add Expenditure for day-to-day purchases and Supplier Bills for formal invoices.
Add Expenditure — select supplier, category, date, amount, and payment method

VAT is calculated automatically — enter the gross amount and the system works out the VAT and net
How do I record a purchase?
Suppliers & Bills
Supplier directory
Go to Expenditure → Supplier Card to search and manage your suppliers. Each supplier card shows contact details, expenditure history, and all invoices.
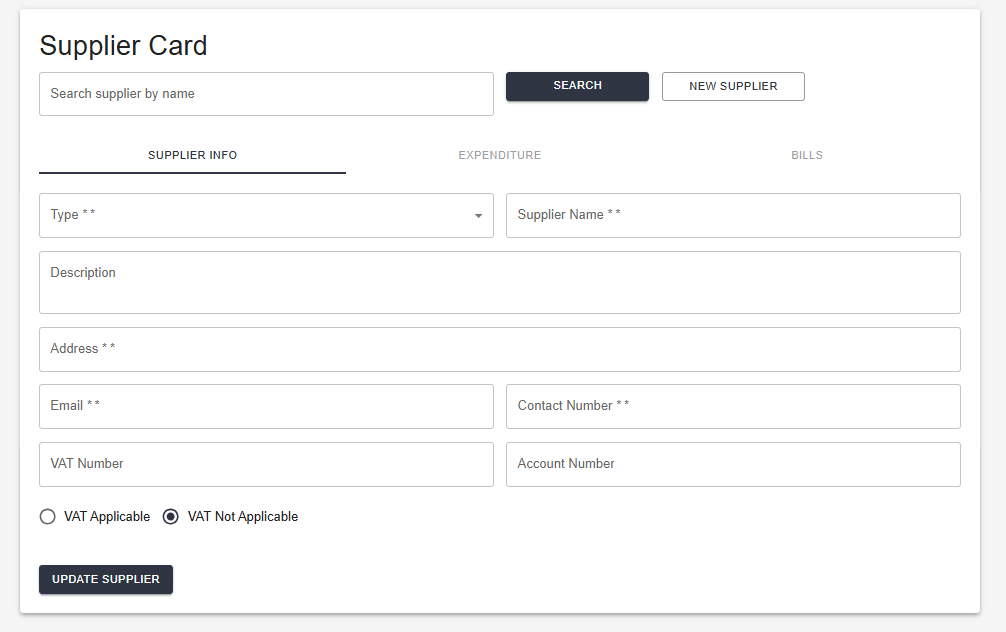
Add Supplier — contact details and VAT registration status
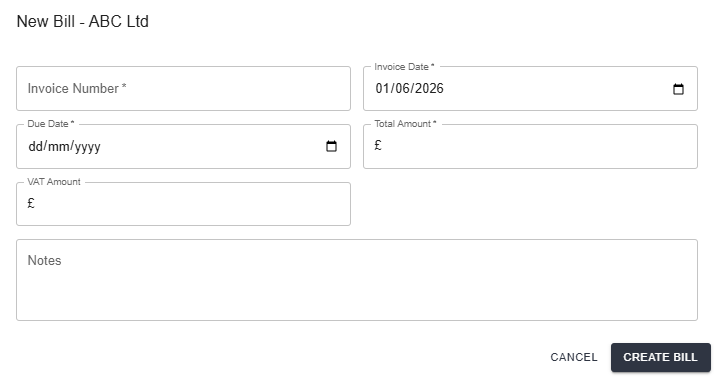
Supplier bills
Use Supplier Bills for formal invoices. Bills track what you owe and what has been paid, giving you an accurate aged payables view.
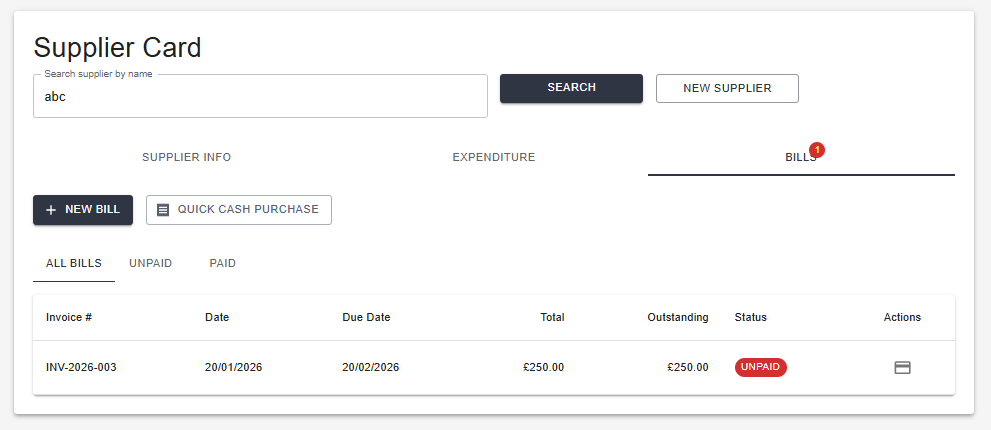
Supplier Bills — paid and unpaid invoices with outstanding amounts

New Bill — invoice reference, date, amount, and VAT
How do I record a supplier bill?
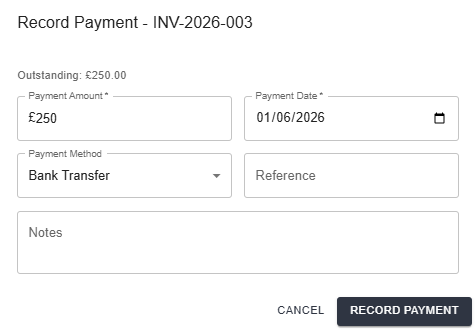
Record Payment — enter the payment date and amount
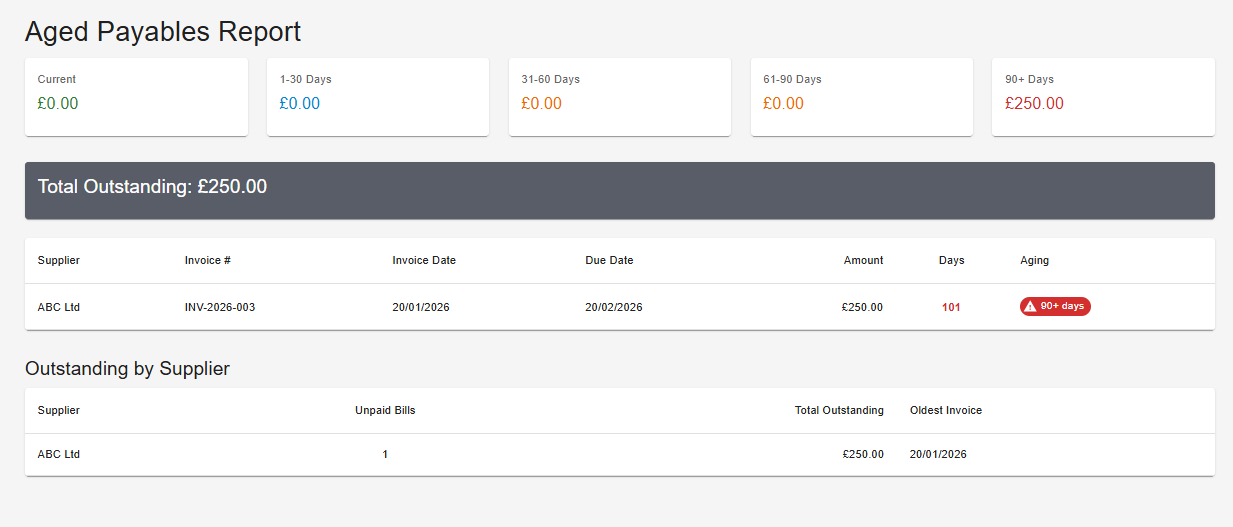
Aged Payables — outstanding amounts by supplier aged by days overdue
Bank CSV import
Import your bank statement CSV to automatically match transactions against existing expenditure records. The system learns your supplier names and suggests category mappings over time.
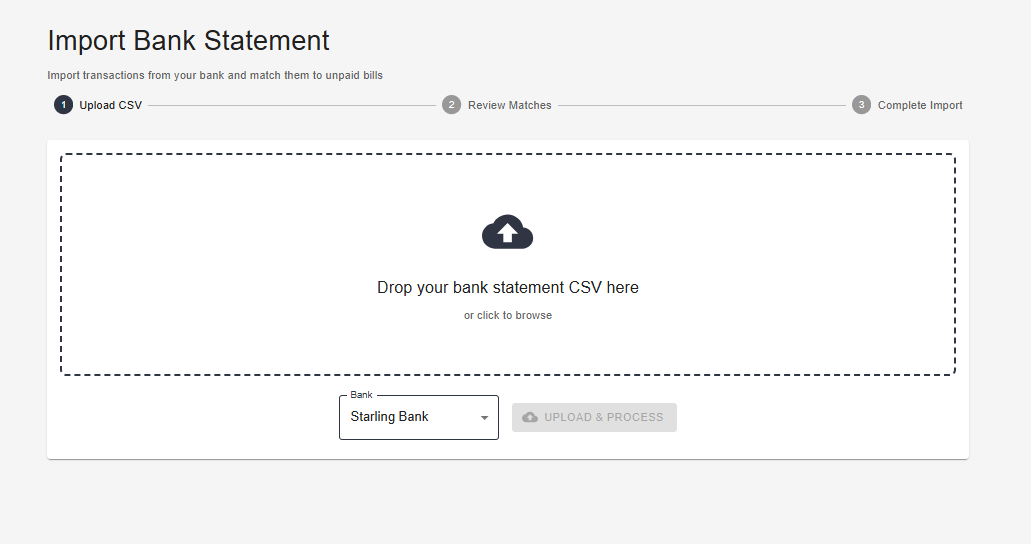
Bank CSV Import — upload your statement and review matched transactions
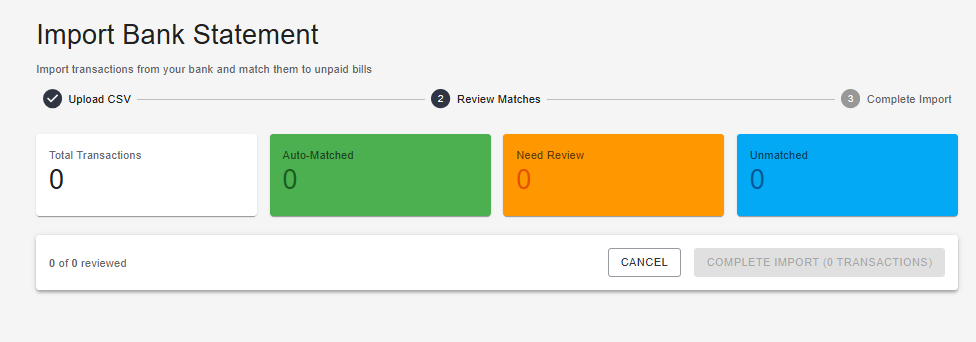
Category mapping — the system learns your vendors and suggests categories automatically
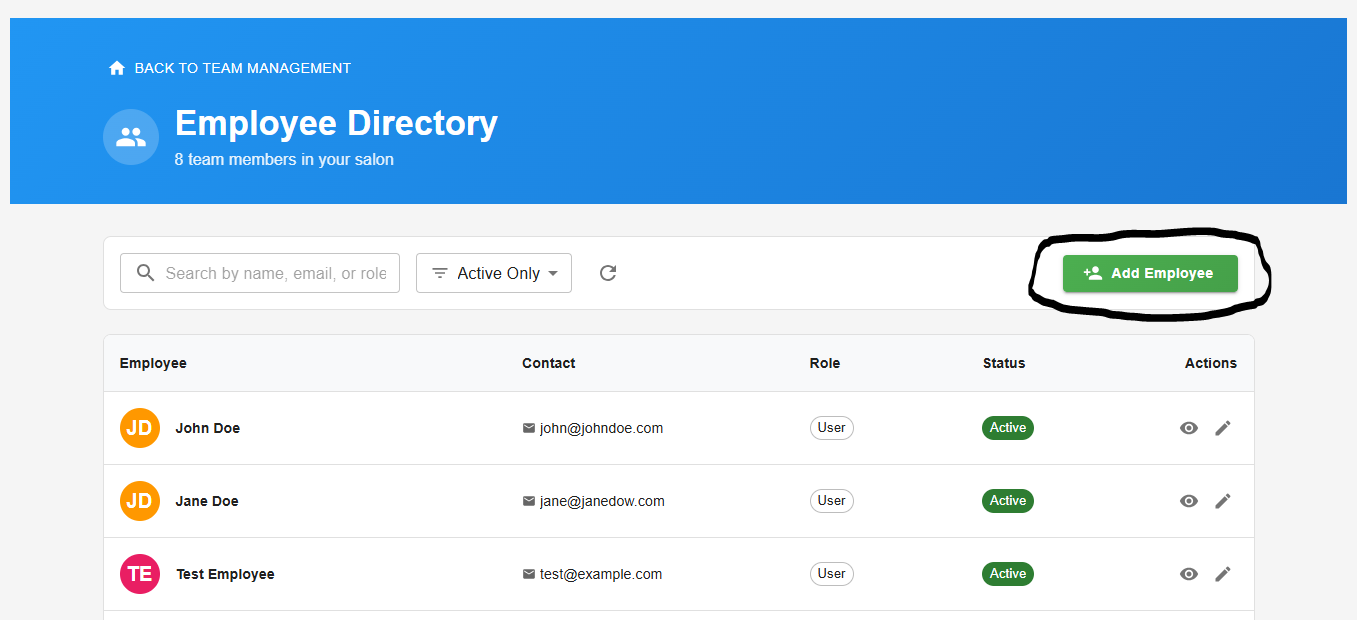
Employee Records
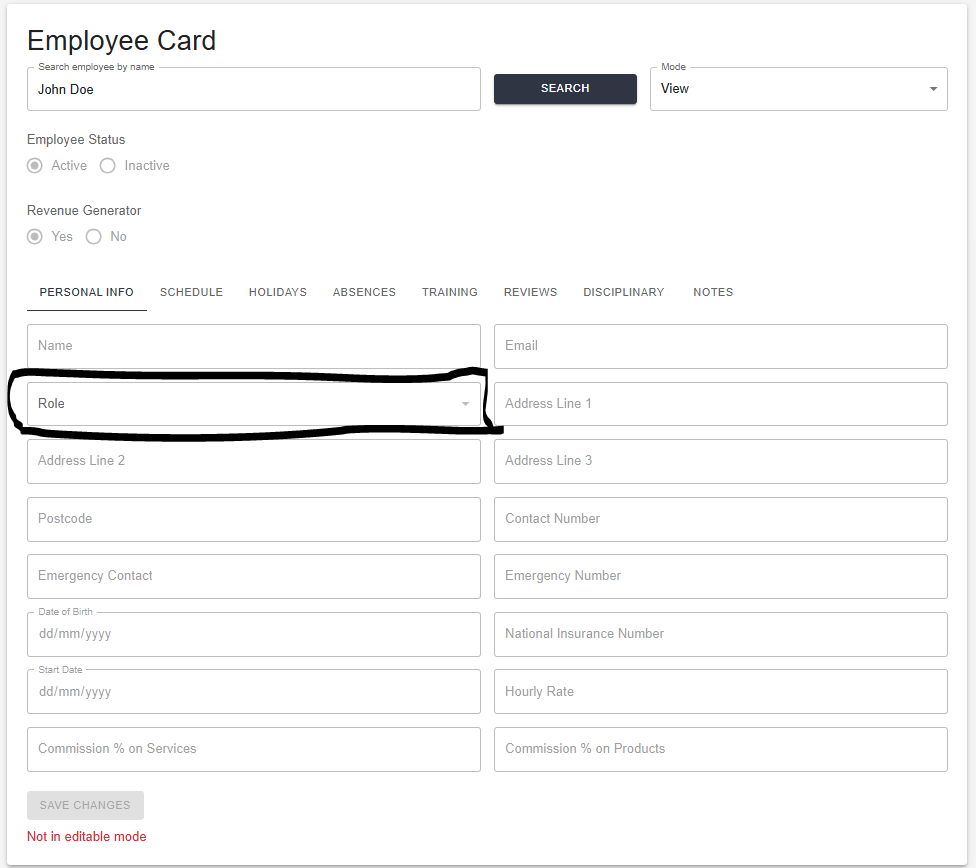
Go to Team → Employees to view and manage your full team. Click any employee to open their employee card — a complete record covering their personal details, leave history, absences, training, and reviews.
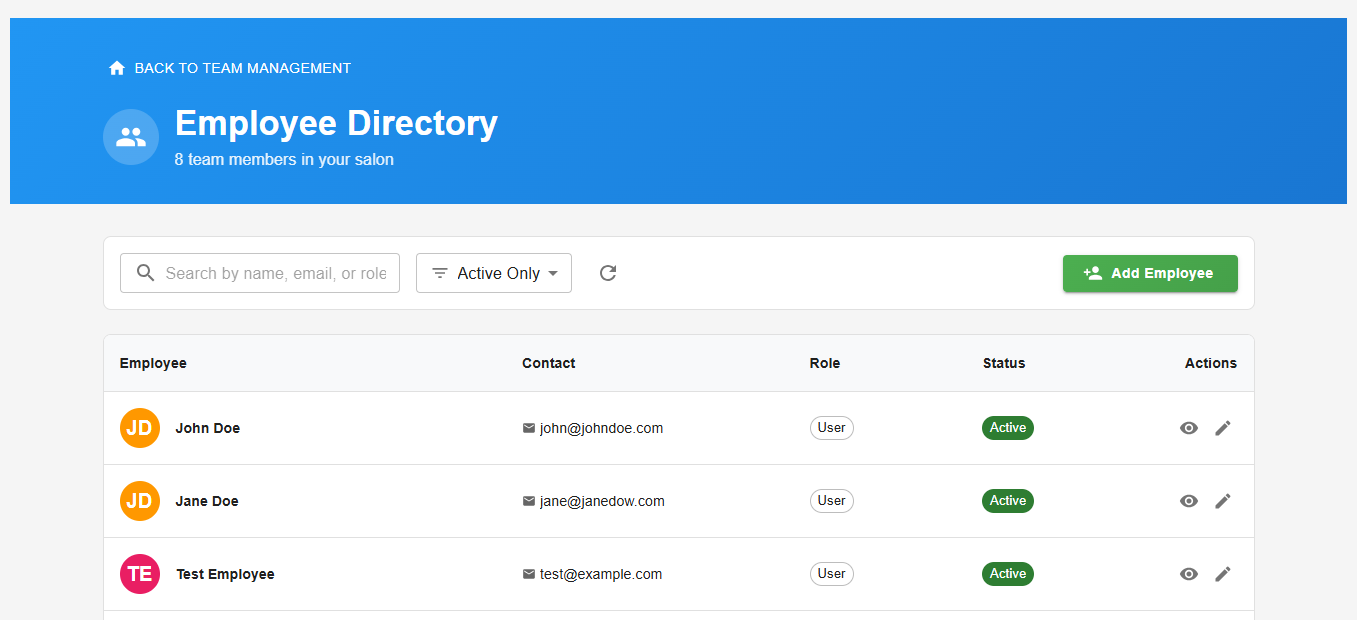
Team → Employees — the full employee directory
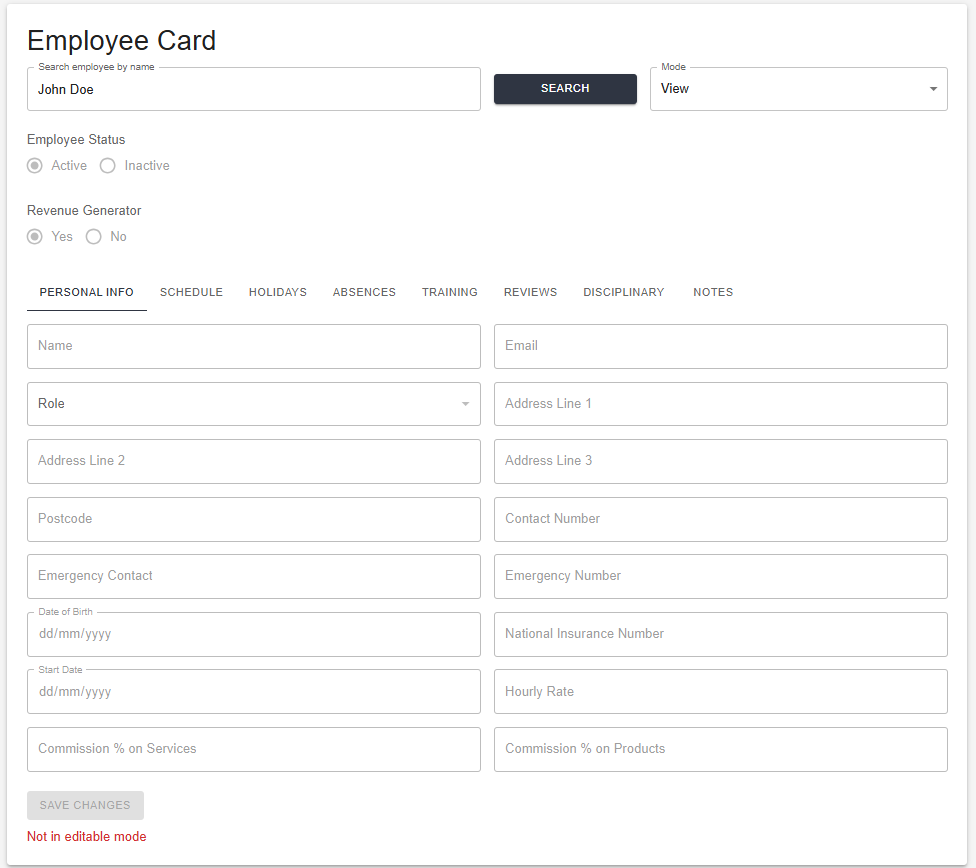
Employee card — overview tab with personal and employment details
Employee card tabs
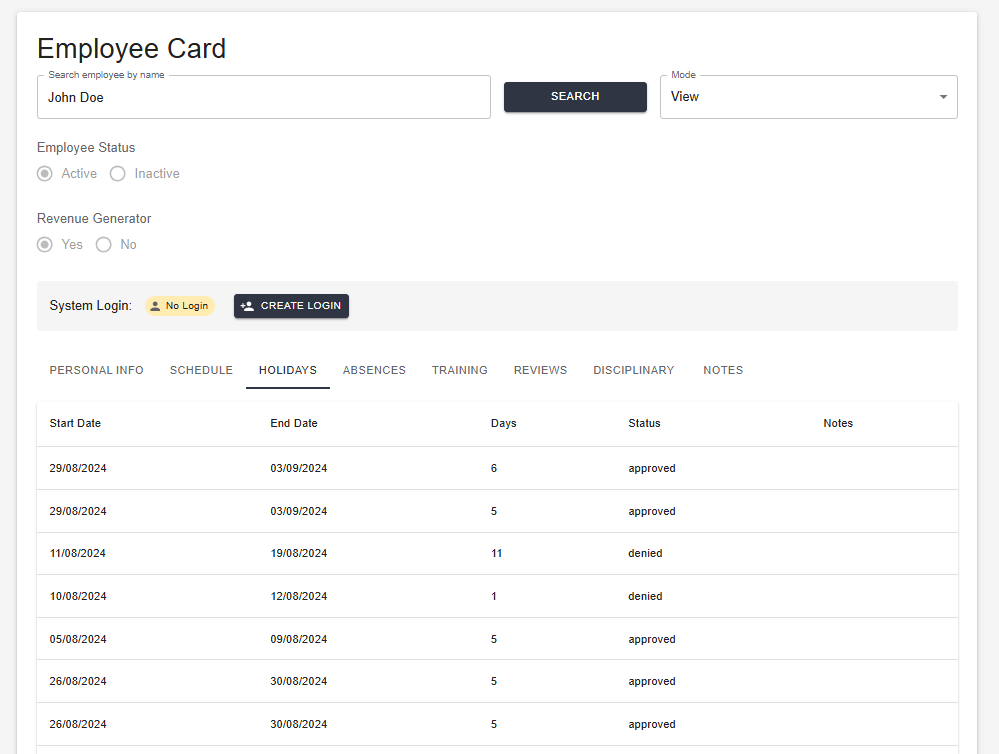
Holidays tab — all holiday requests with status and dates
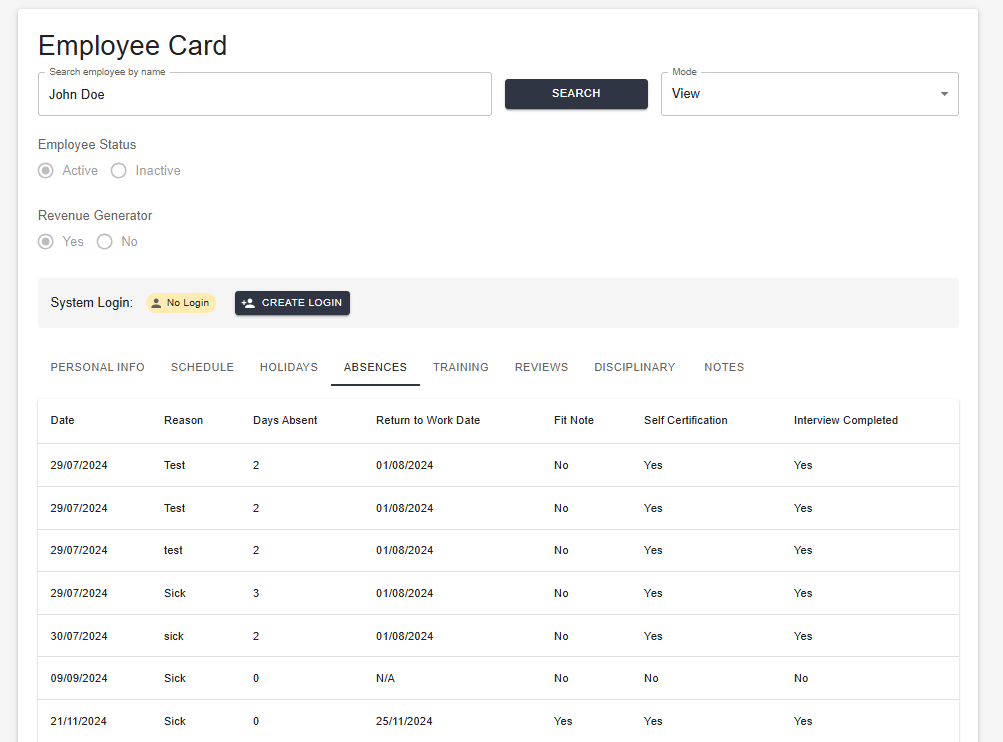
Absences tab — sickness history with Bradford Factor information
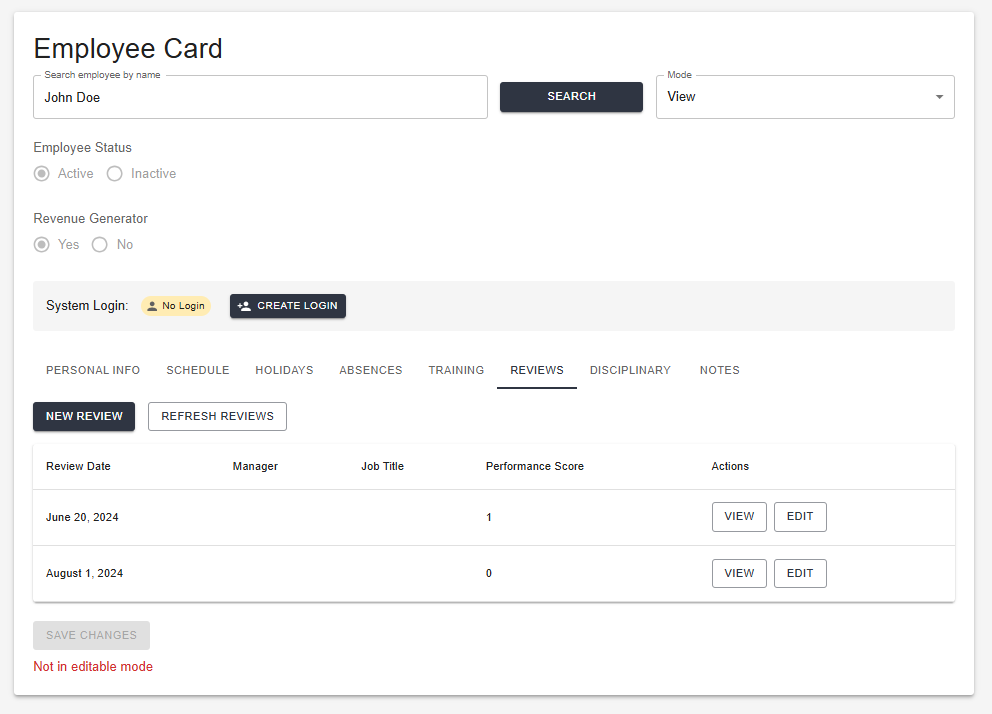
Reviews tab — performance review history
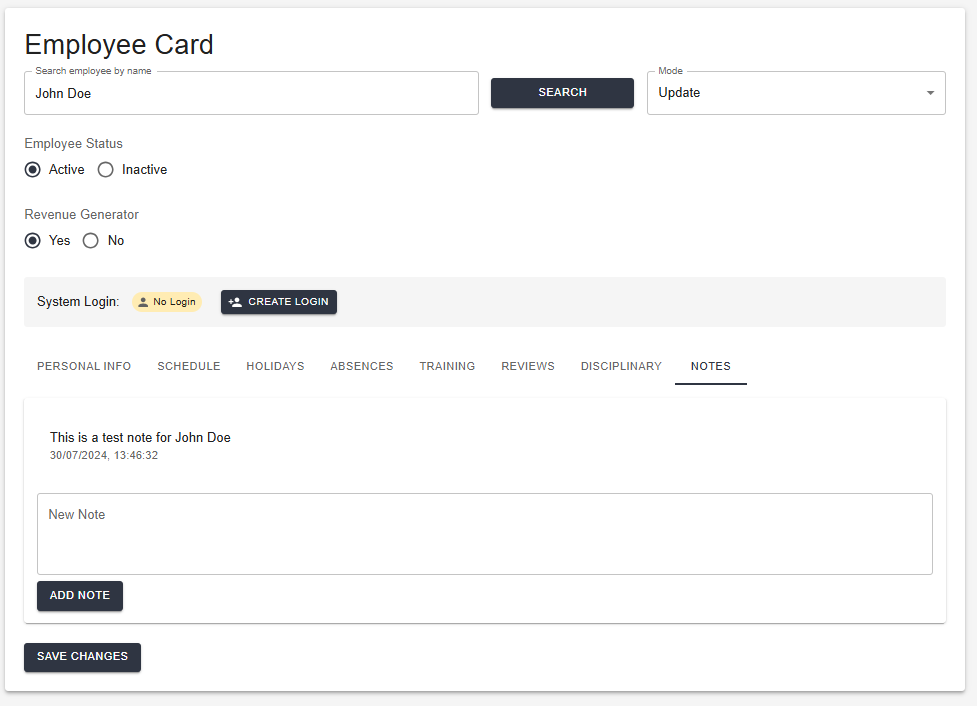
Notes tab — manager-visible notes on the employee record
Leave & Holidays
The leave management system covers annual leave, sickness, flexible working, maternity leave, and all other statutory leave types. All requests route through the approval workflow.
Leave → Pending Requests — all requests awaiting manager action
How do I approve a holiday request?
Leave Balances — entitlement, taken, and remaining days per employee
How do I record a sick day?
Rota & Scheduling
Go to Rota → Build Rota to create and publish weekly rotas. Build shift templates first to save time — for example an “Early” or “Late” shift you use regularly.
Rota Builder — weekly grid with employee rows and shift assignments
How do I publish a rota?
Payroll
The payroll module covers pay rate configuration, SSP calculation, and payroll export. Full automated payroll calculation with payslip generation is planned for 2026.
Payroll → Pay Rates — configured rates for each employee
Payroll Export — select a date range and download a CSV for your payroll provider
🕐 Full Payroll Processing — Coming 2026
Automated payroll calculation including net pay, PAYE, employee NIC, payslip generation, and a complete payroll run audit trail. The current export is compatible with all major payroll providers.
Reviews & Training
The reviews module provides a structured performance review framework. The training module includes over 30 assessment modules covering salon skills, compliance, and customer service — employees complete them through the Employee Portal.
Reviews — list of all employee performance reviews
Training modules — 30+ assessment modules available to assign to employees
Training certificate — generated automatically when an employee passes an assessment
VAT & Making Tax Digital
SalonLogic Pro is a fully MTD-compliant platform. VAT returns are calculated automatically from your income and expenditure records and submitted directly to HMRC through the secure API connection.
VAT → Current Return — the nine boxes calculated automatically from your records
Post-submission confirmation — HMRC reference number logged automatically
How do I submit my VAT return?
VAT submission history — all past returns with HMRC reference numbers
Reports & Business Intelligence
The KPI dashboard gives an at-a-glance view of your salon's performance. Use the efficiency analyser for deeper stylist and day-of-week analysis, and the forecasting tool to plan ahead.
KPI dashboard — revenue, average bill, client count, and VAT status at a glance
Efficiency Analyser — salon overview with stylist performance breakdown
Scenario builder — model the impact of price changes or staffing adjustments
How do I see how my business is performing?
HR Documents
SalonLogic Pro includes over 120 HR document templates covering employment contracts, policies, letters, and statutory notices. Documents are generated with your salon details merged in automatically.
Documents library — template packages with all available documents
Document Vault — all generated documents available to download
How do I generate an HR document?
Services
Go to Services to manage your service menu. Every service has a name, price, duration, and category. Duration is used by the online booking system to block out the correct time in your diary.
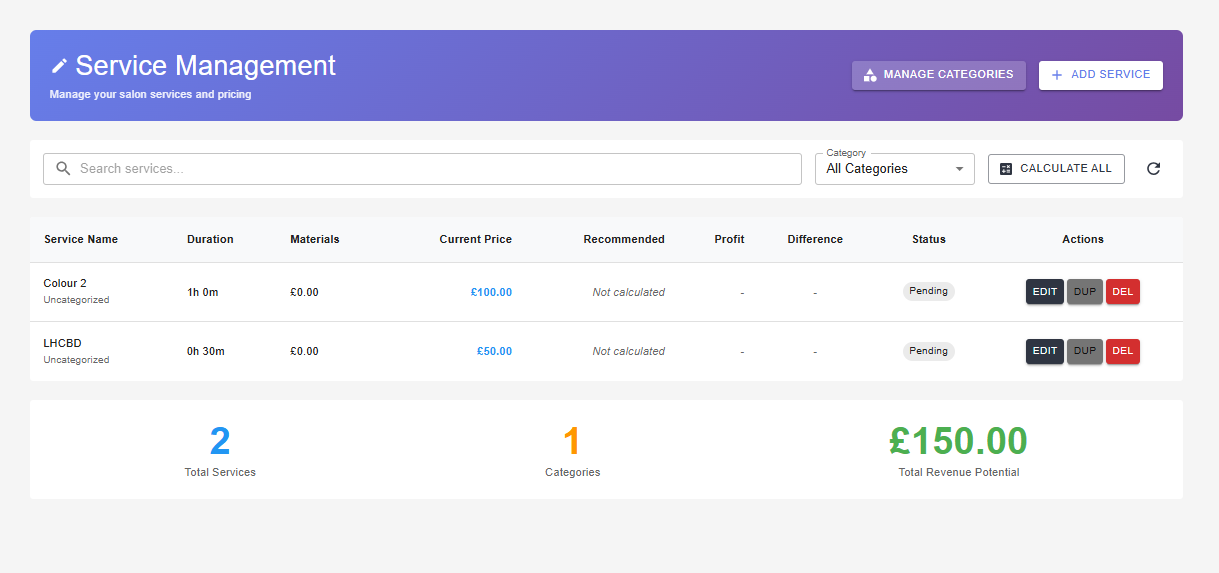
Services — full service menu with prices, durations, and categories
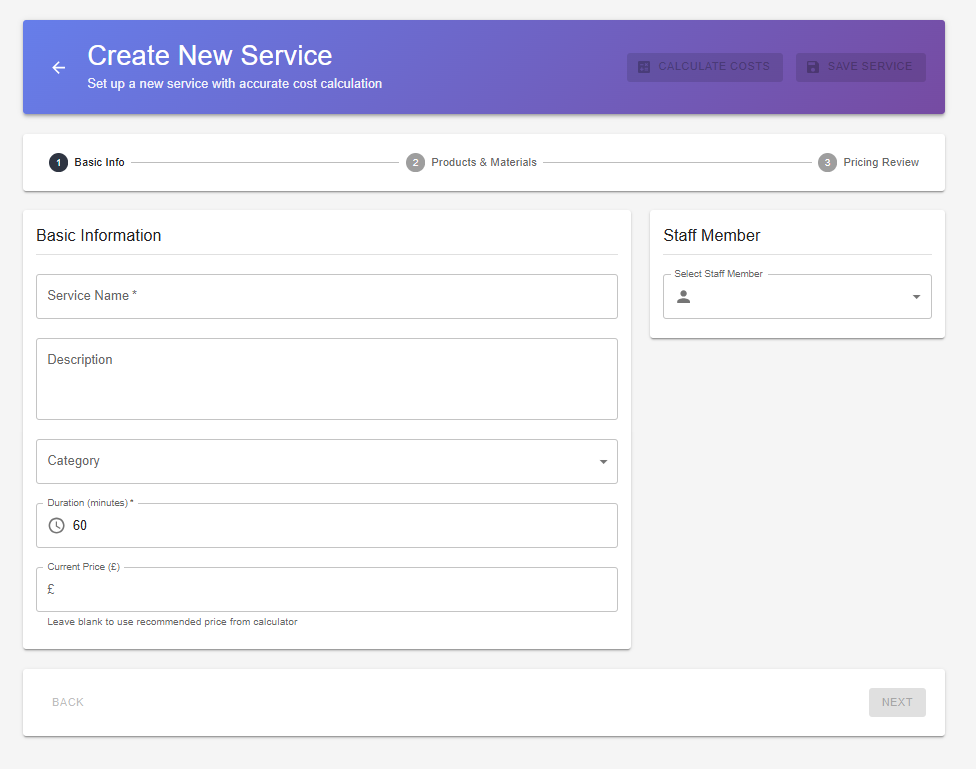
Add Service — name, price, duration, and category
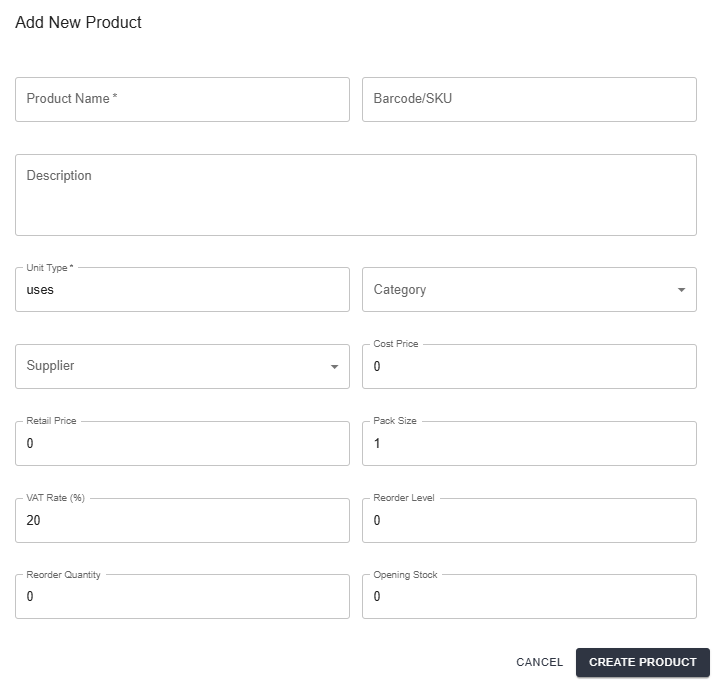
Products & Stock
Add every product you use in the salon — both retail items for sale and backbar products used in services. Accurate cost prices feed directly into your service costing calculations.

Products — full catalogue with cost prices and stock levels

Add Product — name, cost price, unit type, and stock settings
Reorder settings — set a trigger level and the system adds products to your shopping list automatically
Online Booking
SalonLogic Solo includes a public-facing online booking page. Once configured, clients can book directly — bookings appear in your diary automatically.
Public booking page — what your clients see when they click your booking link
Booking Settings — set your slug, cancellation policy, and available services
How do I set up online booking?
Patch test safety
For colour services that require a patch test, the system automatically notifies the client and cancels the appointment 48 hours before the service if no valid patch test is on file. No manual action needed.
Patch test notice — shown automatically to clients booking colour services
Diary & Appointments
Go to My Diary to view and manage your appointments. New bookings from your public page appear automatically. Provisional bookings are shown in a distinct colour until the patch test requirement is met.
SOLO Diary — weekly view with all bookings colour-coded by status
How do I manage incoming bookings?
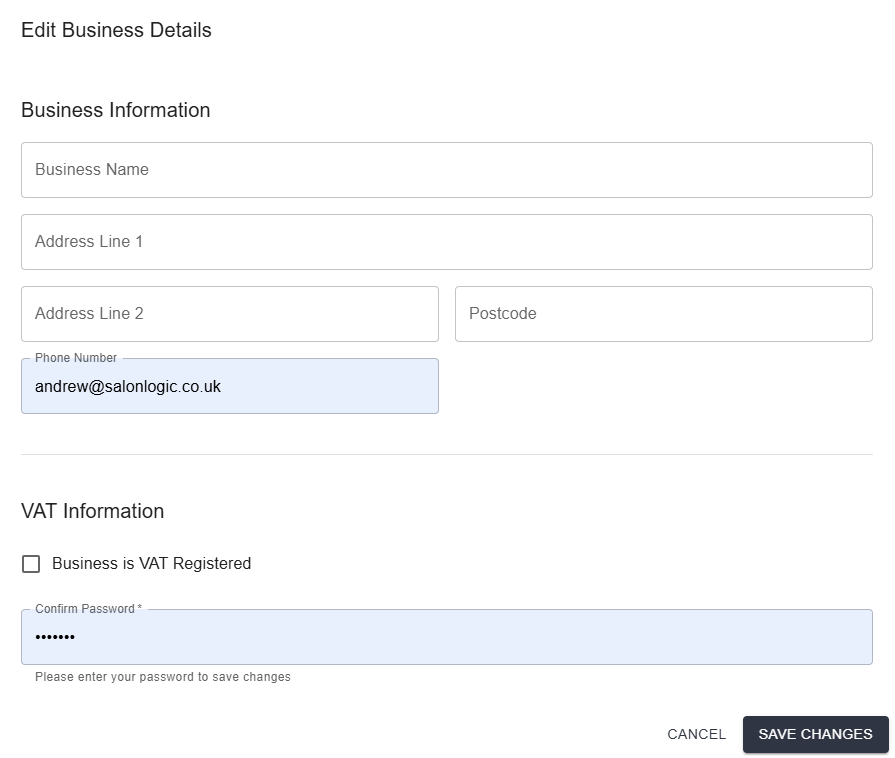
Company Settings
Go to Settings → Company Settings to manage your business details, VAT configuration, holiday year settings, and clock-in configuration.
Company Settings — business details, VAT, holiday year, and clock-in all in one place
User Permissions
Go to Settings → User Permissions (Account Owner only) to customise what each manager role can access. The three built-in roles can be adjusted to match your salon's working practices.
User Permissions — role access table showing what each role can see and do
Planned Features
SalonLogic Pro is actively developed. The following features are planned for release in 2026.
💳 Deposit Collection
Collect a deposit at the time of online booking to reduce no-shows. Powered by Stripe.
📱 SMS Reminders
Automatic appointment reminders and patch test notifications by SMS.
💰 Payroll Processing
Full payroll calculation with net pay, PAYE, NIC, payslip generation, and a complete audit trail.
🏢 Multi-Location Support
Extend one account across multiple salon sites with location-level reporting.
🎯 Business Plan Targets
Set revenue, margin, and client targets and track performance on the KPI dashboard.
👔 Accountant Access
A separate read-only login for your accountant to access reports and VAT submissions.